Saturday, 21 February 2015

More flying birds! (aka the In Flight QAL...)

Hello! Is anyone there?! Oh dear, I've been a bit slack - its been a couple of weeks since the last post... That resolution didn't last long!

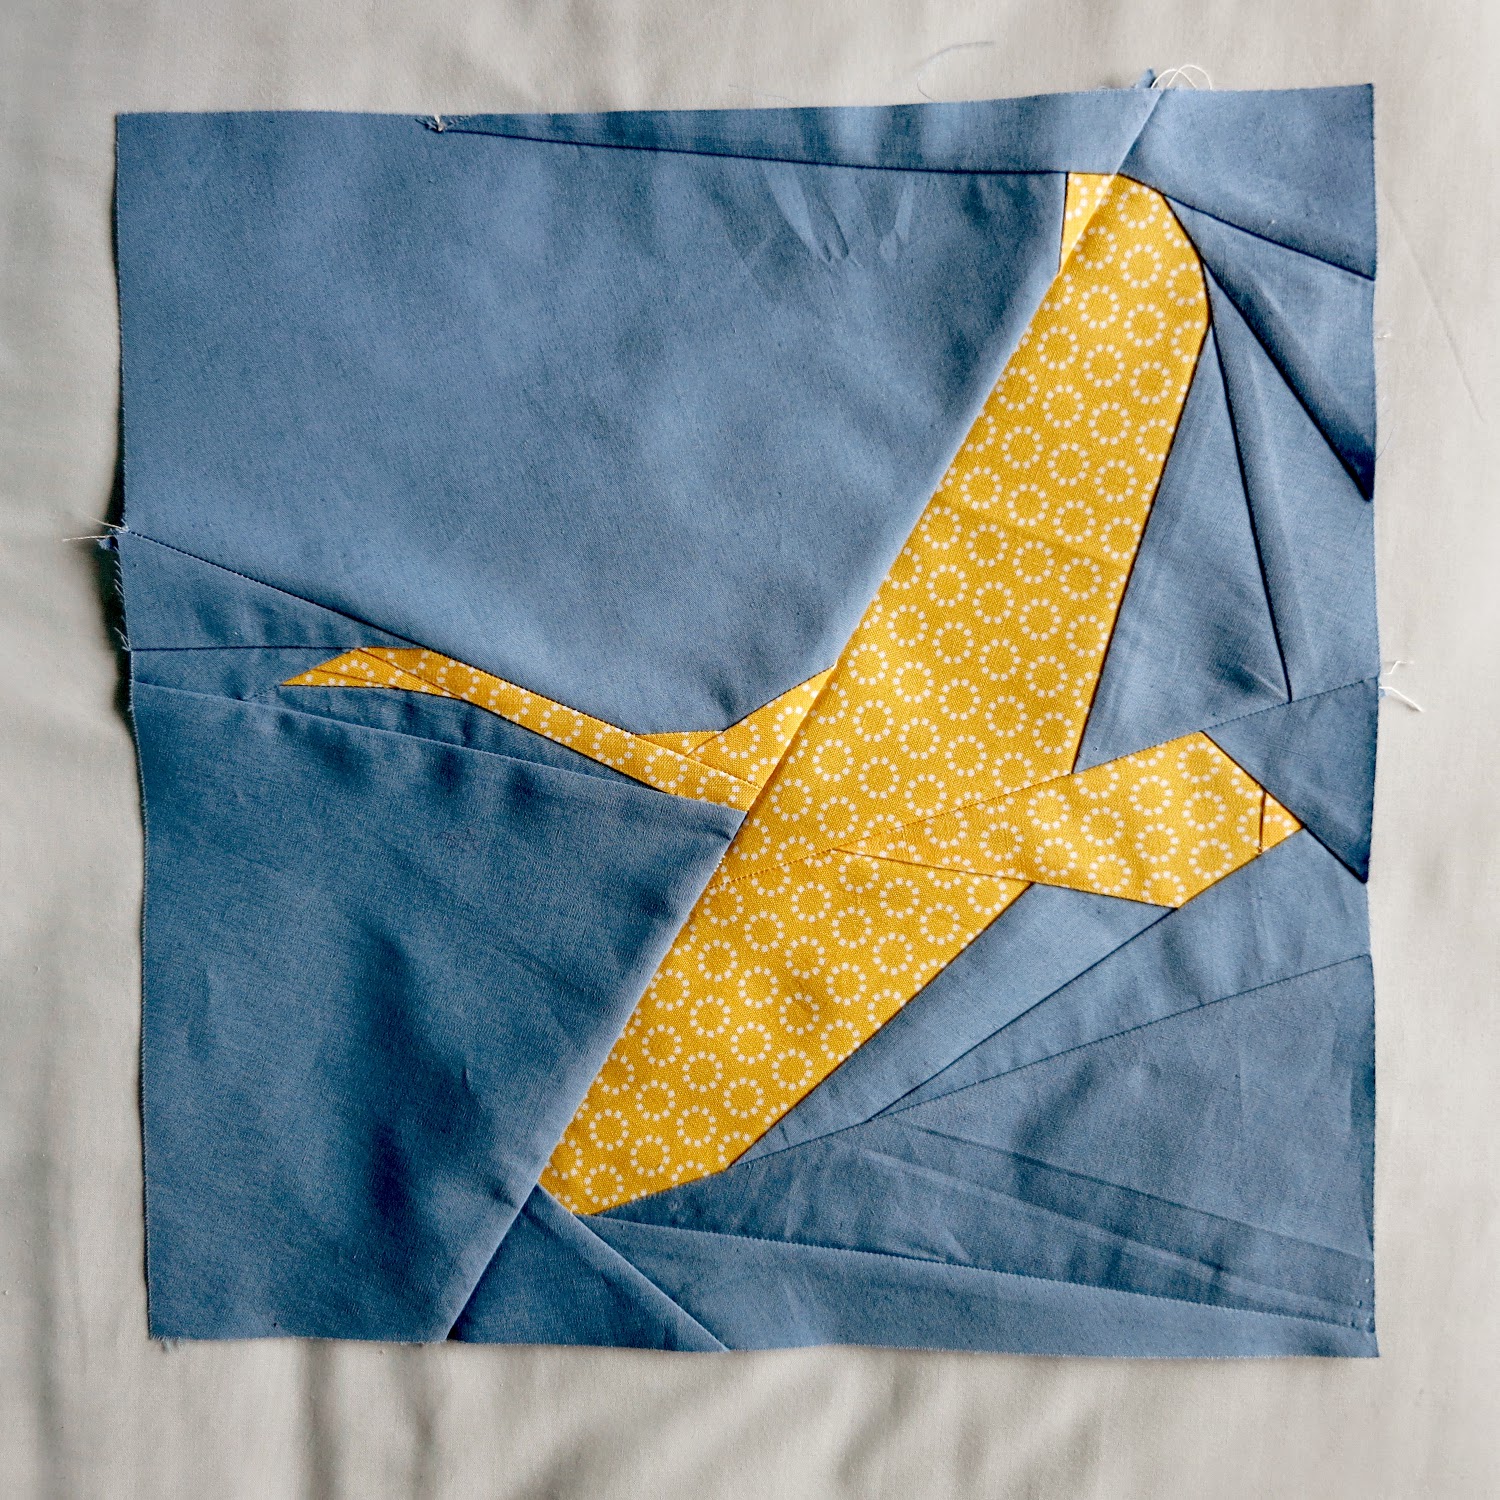
After the challenges of the Swan paper piecing for the first block of the In Flight Quilt along I got a bit addicted! I really enjoyed having to think a bit more about what I was doing and not mindlessly just sewing squares together...

Seagull

Each block/bird for the quilt is divided into four or five sections which are pieced individually then the sections are joined to make up the block.  With my Swan block (as it was my first attempt) I did each section in turn, completing one before starting the next.  As there was lots of running up and down stairs between the sewing room and the ironing board/cutting board after each bit of piecing this meant it took ages!

Once I'd done the Swan and had a bit more understanding/practise on what I was doing, I managed to piece each of the sections in parallel leading to a lot less stair running and faster block completion.

Swift

I'm still not convinced about when to remove the paper and the joining of sections.  I find that trying to join the sections with the paper still attached is just too thick and unwieldy, so I've started removing the paper first and marking/pinning the joins so they match up. I still managed to get the poor seagull out of line though, so had to unpick and re-do that one.  I should really tack the seams first, but I'm too impatient!

Curlew

As well as birds, I've also completed a March block from last year's Vice Versa QAL.  I would have done the opposite block for the month as well, but I seem to have misplaced a bear claw (one of the half square triangles) so I'll need to cut and sew another one before I can complete the block (or find the missing one under the sofa....)  


Saturday, 7 February 2015

Swan in flight

It may have been mentioned before but this year I am trying to do new things, and one of those is paper pieced quilting.  I can't remember whose blog featured or provided the link, but somehow I came across the In Flight Quilt Along with the pattern designed by Juliet from The Tartan Kiwi.

Copyright The Tartan Kiwi Source
I was literally blown away by the design. I think it just looks amazing, and the challenge to create something like that couldn't be resisted so I bought the pattern straight away!

Juliet has lots of tutorials on her blog for paper piecing so I devoured them all, and then got stuck in to the cutting and sewing and pressing and trimming....


There was a fair amount of swearing and unpicking going on - mainly when I was being stingy and using bits of fabric that ended up being too small, or getting my brain confused with back to front mirroring of the image.  I even had to unpick one of the seams that join the four main sections as the swan wasn't lining up perfectly (trying to perfect the perfectionist approach rather than the usual 'its good enough approach).

Eventually, I got to this:


I am very proud of myself (big smiley happy face!).  Although I probably should have pressed it again before taking the photo.... Oh well.

Tuesday, 3 February 2015

A hot off the press Jasper Sweater!!

I know I'm not supposed to be buying fabric, but last week Paprika patterns released their second design, and it's the one item of clothing that I wear the most.

Enter the Jasper Sweater.....

Copyright Paprika Patterns - source

Isn't it the cutest ever? A fitted princess seam hoodie with tube pocket? That just ticks all the boxes!

Unfortunately (or fortunately) the release coincided with a crazy early day at work which meant I finished at lunchtime and was able to pop in to Abakhan on the way home.  Rooting through the fabric bins I found 1.85m of thick sweater fabric in blue/teal (my favourite colour, so destiny!) for the grand price of £11.

I cut a size 3 and graded out to a 4 at the waist (my usual type of adjustment), deciding on the sweater with hood version as that'll get the most wear (I do love the cowl and dress as well though!). Not having done princess seams before I wasn't sure which bits to grade so I left the size panels as standard and graded the front and back pieces.  I forgot about the pocket though!

Fortunately I realised before cutting the fabric, so cheated and laid the pocket and front bodice pieces on top of each other to cut around....


Usually I'll add an inch or so to the bodice length as I'm long in body/short in leg, but this is drafted for 5'7'' (I'm only 5'5'') and the quoted finished bodice length seemed fine.


The instructions were really clear with additional photo tutorials on the website for the tricky bits - welt pockets and hood construction. I was paying extra attention for these so it all went swimmingly. I could see where it would be easy to get confused when attaching the hood/cowl to the bodice, there was a lot of fabric!  Seems I wasn't paying attention the whole time though as I sewed the top of the pocket and lining together, but also sewed the front bodice.  However I really like that curved line of stitching across the front so it's staying (and unpicking from thick sweater fabric? Na, too hard....)

I did add some twill tape to the shoulder seams, which I've started doing to my knit projects to stop them stretching out of shape.


Before adding the cuffs I tried it on (as recommended in the instructions!!) and decided to take 1" off the sleeve length.  I think they're spot on now.

I'm still not sure about the seam finishes.  There were a couple of options suggested in the instructions but they involve pressing the seam open.  The problem is the knit stitch on my sewing machine (which is fantastic BTW) means that you can't open the seam.  For the back hood seam I sewed a straight stitch so was able to open the seam and then topstitch the seam allowances down.  But for the neck and front hood/cowl seam I used the knit stitch. In the end I pressed it to one site, and then used the twin needle to topstitch it down. It's not my finest work, but I'm happy enough with it (but not happy enough to take a picture and show you!!).


I'm not sure looking at these photos if the hood is a bit too big? It looks fine on the Paprika patterns shots so maybe mine just needs a wash to soften up a bit.

The only thing I might change on the next one (other than sewing the pocket correctly) is to add a little width on the bottom edge. It's not too small, but there's not a lot of ease so I'll see what it's like paired with jeans.