Thursday, 6 August 2015

Now in Cow Town....


I've been gone from the blog for a long time (again) and that's due to the massive changes going on around here!  In the last 3-4 months I've up sticks and moved country!! Now coming to you from Calgary, Alberta, Canada!

This change really kicked off last year. We had our fantastic biking holiday to Indochina, then one of my colleagues moved to Singapore, and along with that there were significant changes going on with my place of work (which hasn't been a pleasant place to be for the last few years).  I had itchy feet, was bored, and truly dreaded getting up in the morning to go to work..... So when a job opportunity came up with my employer in the Calgary office, I applied.  And probably because our software is so specialised, and importing a Brit is cheaper than training someone from scratch - I got the job!

Because of the situation (customer relations and visa requirements), there was a very quick turnaround between me leaving my UK job and starting the Canada one.  So my poor long suffering boyfriend is stuck back in Blighty trying to sell the house, while I'm swanning around in the mountains with bikes and hiking boots.

And now my mother (Hi Mum!!) is complaining that I haven't been updating the blog, so she can't see what I'm up to (she didn't get on with Facebook, and doesn't use Instagram).  I thought I'd better start back up.  What better way to start, than with a western style shirt....


In honour of Calgary Stampede (ok, that was a month ago but I'm prepped for next year now) we have Simplicity 1538.  Lots of people were wearing plaid shirts at the Stampede (and at work during Stampede week - it's a uniform really....), but I wanted to make a more traditional style and I already had this pattern with the front and back yokes.


I bought the fabric here in Calgary, it was only $6pm and is quite a loose weave cotton so will be great for summer wear.  I cut a size 12 and graded out to 14 at the waist.  I often find the cuffs on shirts too tight so I cut a size 14 cuff and graded the sleeve out as well, but I think now they're a bit big - I'll try and get pictures at some point but I don't have a tripod here at the moment....  It might be a little tight around the top of the sleeve now - I have ex-climbing muscles at the front of my shoulder (pectoralis major? anyway that bit that creates the hollow of your armpit) that often create fitting issues.  So I might need to swap the sizing and do the sleeve head in a 14 and cuff in a 12.

I really like the yoke details, pockets and flaps in this pattern, and the general shape of the shirt, but I'm not so keen on the cuff placket.  It turned out quite neat, I just would like to have the placket visible - so I'll hunt around for different methods when I make this shirt again. Oh and if you look closely at the left cuff in the back photo below, you can see that I got the placket the wrong way round....


The instructions tell you to gather the excess in the back before attaching to the back yoke, but I didn't like the look of the gathers so created a pleat in the centre instead. The yoke pieces are all cut on the bias as well, so you get that diagonal plaid.


I did manage to match the plaid across the front and almost at the side seams, but the button placket is 'upside down'.  I haven't decided if I like that, or if I'd prefer all the lines to match across the front. I really should have got the pocket flaps in line as well I suppose.


I did try to flat fell all my seams, which was easy enough to do (plenty of tutorials if you search on line).  For the next one, I'd prefer to have the two rows of stitching on the outside though, so I'll need to remember to sew all the seams wrong side together first.  All the double rows of topstitching are in the pattern instructions as the 'Western Style' design feature,, and I even used Tilly's trick of moving the needle over (I used position 5) and lining the edge up with the centre of the foot to get the neater line.  If you look really really closely you can tell which were the first wonky tries, and what came later with more practise!


And just because I felt like it, I added a loop to the collar on the inside of the shirt!


Wednesday, 20 May 2015

Baby memories

Greetings strangers! There's been lots happening around here so not much sewing or gardening going on... But today I'm actually making some progress! I promised a memory quilt to the minister at my Mum's church, made with babygrows from their first born. To my shame they gave me the bags of clothes back in February, but I hadn't started until this week.

A bit of Internet research, and I came up with a plan.  I'm cutting them down to useable pieces (backs and fronts, basically) then interfacing to stabilise the fabric. They're all knit fabric so if I didn't they'd be impossible to piece together and quilt. 


My plan is to piece together scraps in rows and then join the rows, so I'm cutting and organising the pieces into piles of equal height for the rows. I'll worry about the length of the rows when I join them together. Depending on how much fabric I can get from the clothes, I may end up adding in some rows of quilting fabric. I'm aiming for a finished quilt size of about 4' x 5'.

I'm approaching an impasse now though... There's a second bag of clothes and not much interfacing left....


Saturday, 21 February 2015

More flying birds! (aka the In Flight QAL...)

Hello! Is anyone there?! Oh dear, I've been a bit slack - its been a couple of weeks since the last post... That resolution didn't last long!

After the challenges of the Swan paper piecing for the first block of the In Flight Quilt along I got a bit addicted! I really enjoyed having to think a bit more about what I was doing and not mindlessly just sewing squares together...

Seagull

Each block/bird for the quilt is divided into four or five sections which are pieced individually then the sections are joined to make up the block.  With my Swan block (as it was my first attempt) I did each section in turn, completing one before starting the next.  As there was lots of running up and down stairs between the sewing room and the ironing board/cutting board after each bit of piecing this meant it took ages!

Once I'd done the Swan and had a bit more understanding/practise on what I was doing, I managed to piece each of the sections in parallel leading to a lot less stair running and faster block completion.

Swift

I'm still not convinced about when to remove the paper and the joining of sections.  I find that trying to join the sections with the paper still attached is just too thick and unwieldy, so I've started removing the paper first and marking/pinning the joins so they match up. I still managed to get the poor seagull out of line though, so had to unpick and re-do that one.  I should really tack the seams first, but I'm too impatient!

Curlew

As well as birds, I've also completed a March block from last year's Vice Versa QAL.  I would have done the opposite block for the month as well, but I seem to have misplaced a bear claw (one of the half square triangles) so I'll need to cut and sew another one before I can complete the block (or find the missing one under the sofa....)  


Saturday, 7 February 2015

Swan in flight

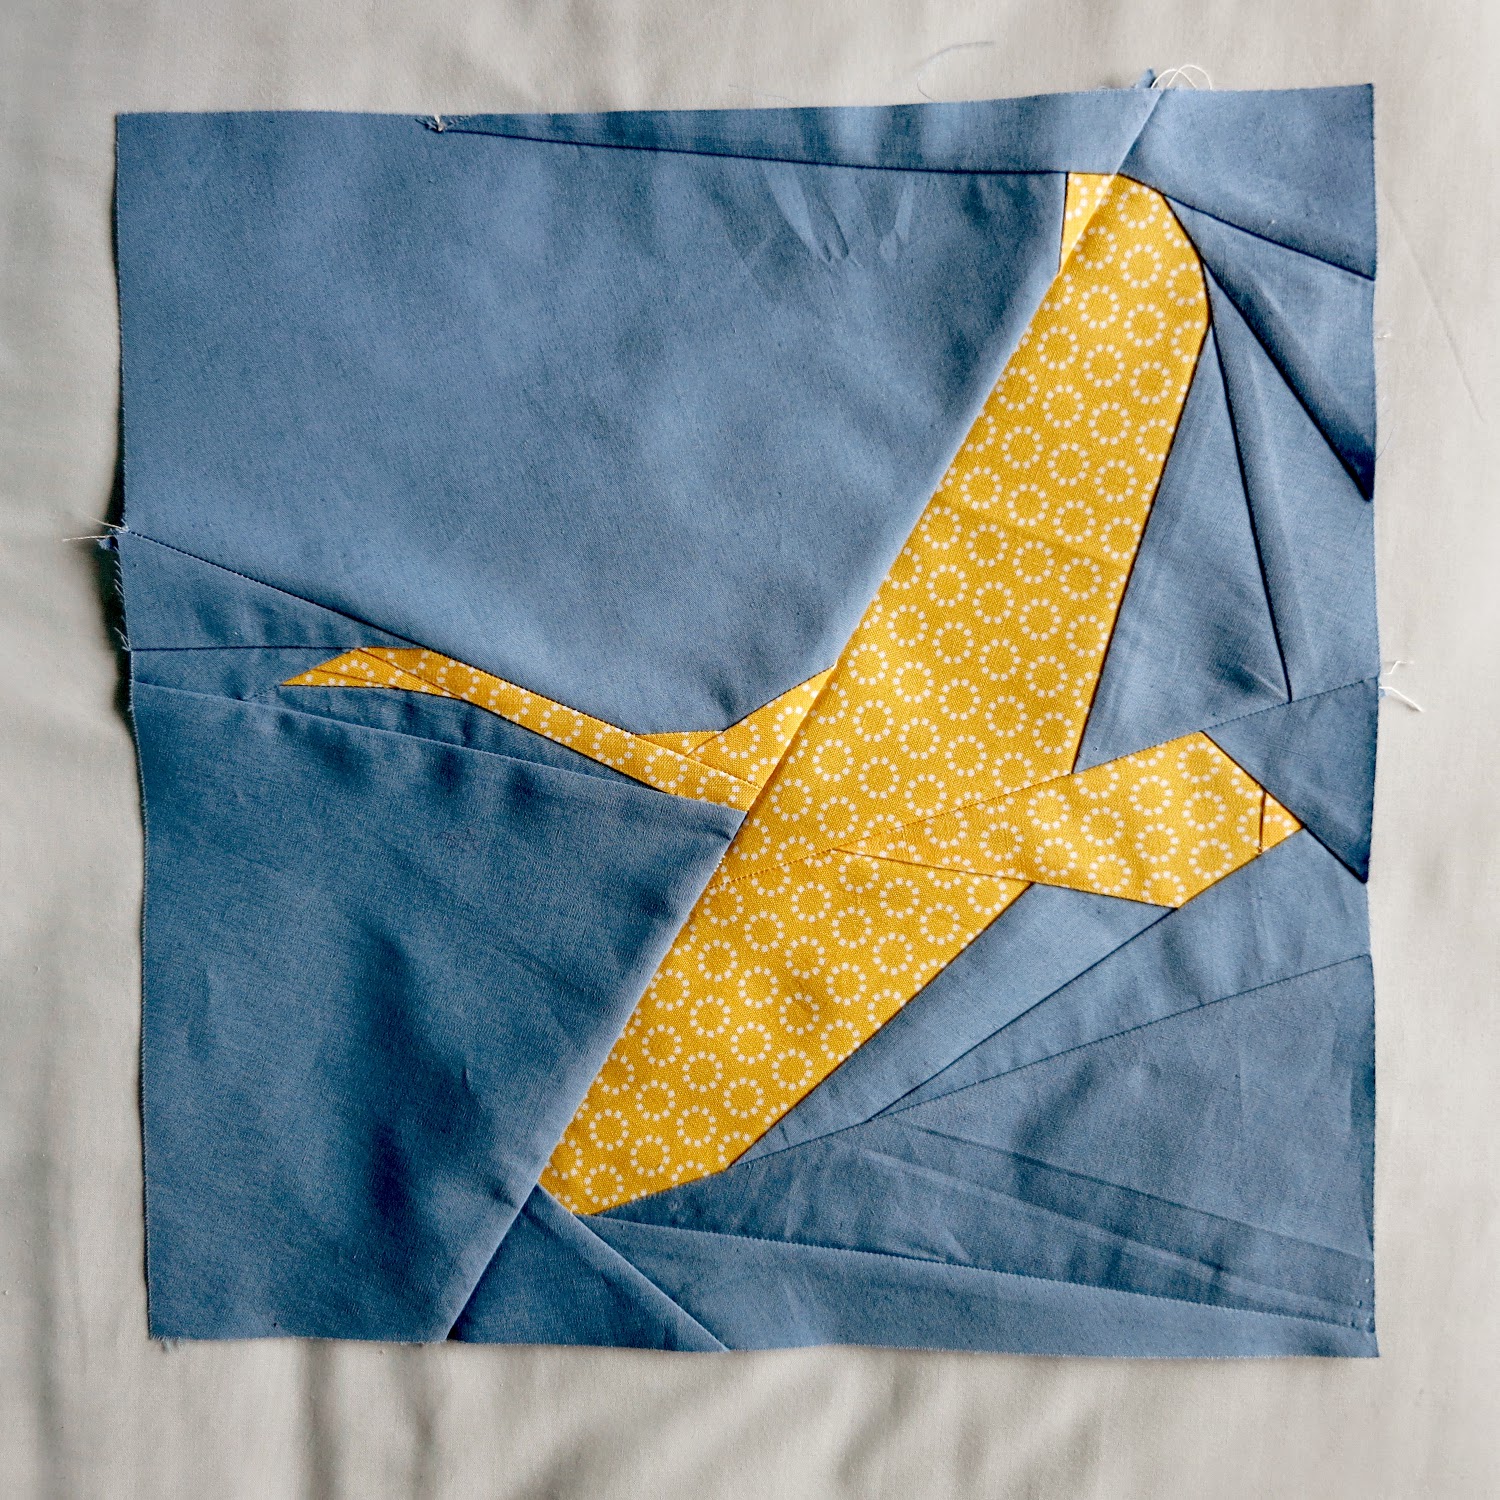
It may have been mentioned before but this year I am trying to do new things, and one of those is paper pieced quilting.  I can't remember whose blog featured or provided the link, but somehow I came across the In Flight Quilt Along with the pattern designed by Juliet from The Tartan Kiwi.

Copyright The Tartan Kiwi Source
I was literally blown away by the design. I think it just looks amazing, and the challenge to create something like that couldn't be resisted so I bought the pattern straight away!

Juliet has lots of tutorials on her blog for paper piecing so I devoured them all, and then got stuck in to the cutting and sewing and pressing and trimming....


There was a fair amount of swearing and unpicking going on - mainly when I was being stingy and using bits of fabric that ended up being too small, or getting my brain confused with back to front mirroring of the image.  I even had to unpick one of the seams that join the four main sections as the swan wasn't lining up perfectly (trying to perfect the perfectionist approach rather than the usual 'its good enough approach).

Eventually, I got to this:


I am very proud of myself (big smiley happy face!).  Although I probably should have pressed it again before taking the photo.... Oh well.

Tuesday, 3 February 2015

A hot off the press Jasper Sweater!!

I know I'm not supposed to be buying fabric, but last week Paprika patterns released their second design, and it's the one item of clothing that I wear the most.

Enter the Jasper Sweater.....

Copyright Paprika Patterns - source

Isn't it the cutest ever? A fitted princess seam hoodie with tube pocket? That just ticks all the boxes!

Unfortunately (or fortunately) the release coincided with a crazy early day at work which meant I finished at lunchtime and was able to pop in to Abakhan on the way home.  Rooting through the fabric bins I found 1.85m of thick sweater fabric in blue/teal (my favourite colour, so destiny!) for the grand price of £11.

I cut a size 3 and graded out to a 4 at the waist (my usual type of adjustment), deciding on the sweater with hood version as that'll get the most wear (I do love the cowl and dress as well though!). Not having done princess seams before I wasn't sure which bits to grade so I left the size panels as standard and graded the front and back pieces.  I forgot about the pocket though!

Fortunately I realised before cutting the fabric, so cheated and laid the pocket and front bodice pieces on top of each other to cut around....


Usually I'll add an inch or so to the bodice length as I'm long in body/short in leg, but this is drafted for 5'7'' (I'm only 5'5'') and the quoted finished bodice length seemed fine.


The instructions were really clear with additional photo tutorials on the website for the tricky bits - welt pockets and hood construction. I was paying extra attention for these so it all went swimmingly. I could see where it would be easy to get confused when attaching the hood/cowl to the bodice, there was a lot of fabric!  Seems I wasn't paying attention the whole time though as I sewed the top of the pocket and lining together, but also sewed the front bodice.  However I really like that curved line of stitching across the front so it's staying (and unpicking from thick sweater fabric? Na, too hard....)

I did add some twill tape to the shoulder seams, which I've started doing to my knit projects to stop them stretching out of shape.


Before adding the cuffs I tried it on (as recommended in the instructions!!) and decided to take 1" off the sleeve length.  I think they're spot on now.

I'm still not sure about the seam finishes.  There were a couple of options suggested in the instructions but they involve pressing the seam open.  The problem is the knit stitch on my sewing machine (which is fantastic BTW) means that you can't open the seam.  For the back hood seam I sewed a straight stitch so was able to open the seam and then topstitch the seam allowances down.  But for the neck and front hood/cowl seam I used the knit stitch. In the end I pressed it to one site, and then used the twin needle to topstitch it down. It's not my finest work, but I'm happy enough with it (but not happy enough to take a picture and show you!!).


I'm not sure looking at these photos if the hood is a bit too big? It looks fine on the Paprika patterns shots so maybe mine just needs a wash to soften up a bit.

The only thing I might change on the next one (other than sewing the pocket correctly) is to add a little width on the bottom edge. It's not too small, but there's not a lot of ease so I'll see what it's like paired with jeans.


Friday, 30 January 2015

Vice Versa catch up...


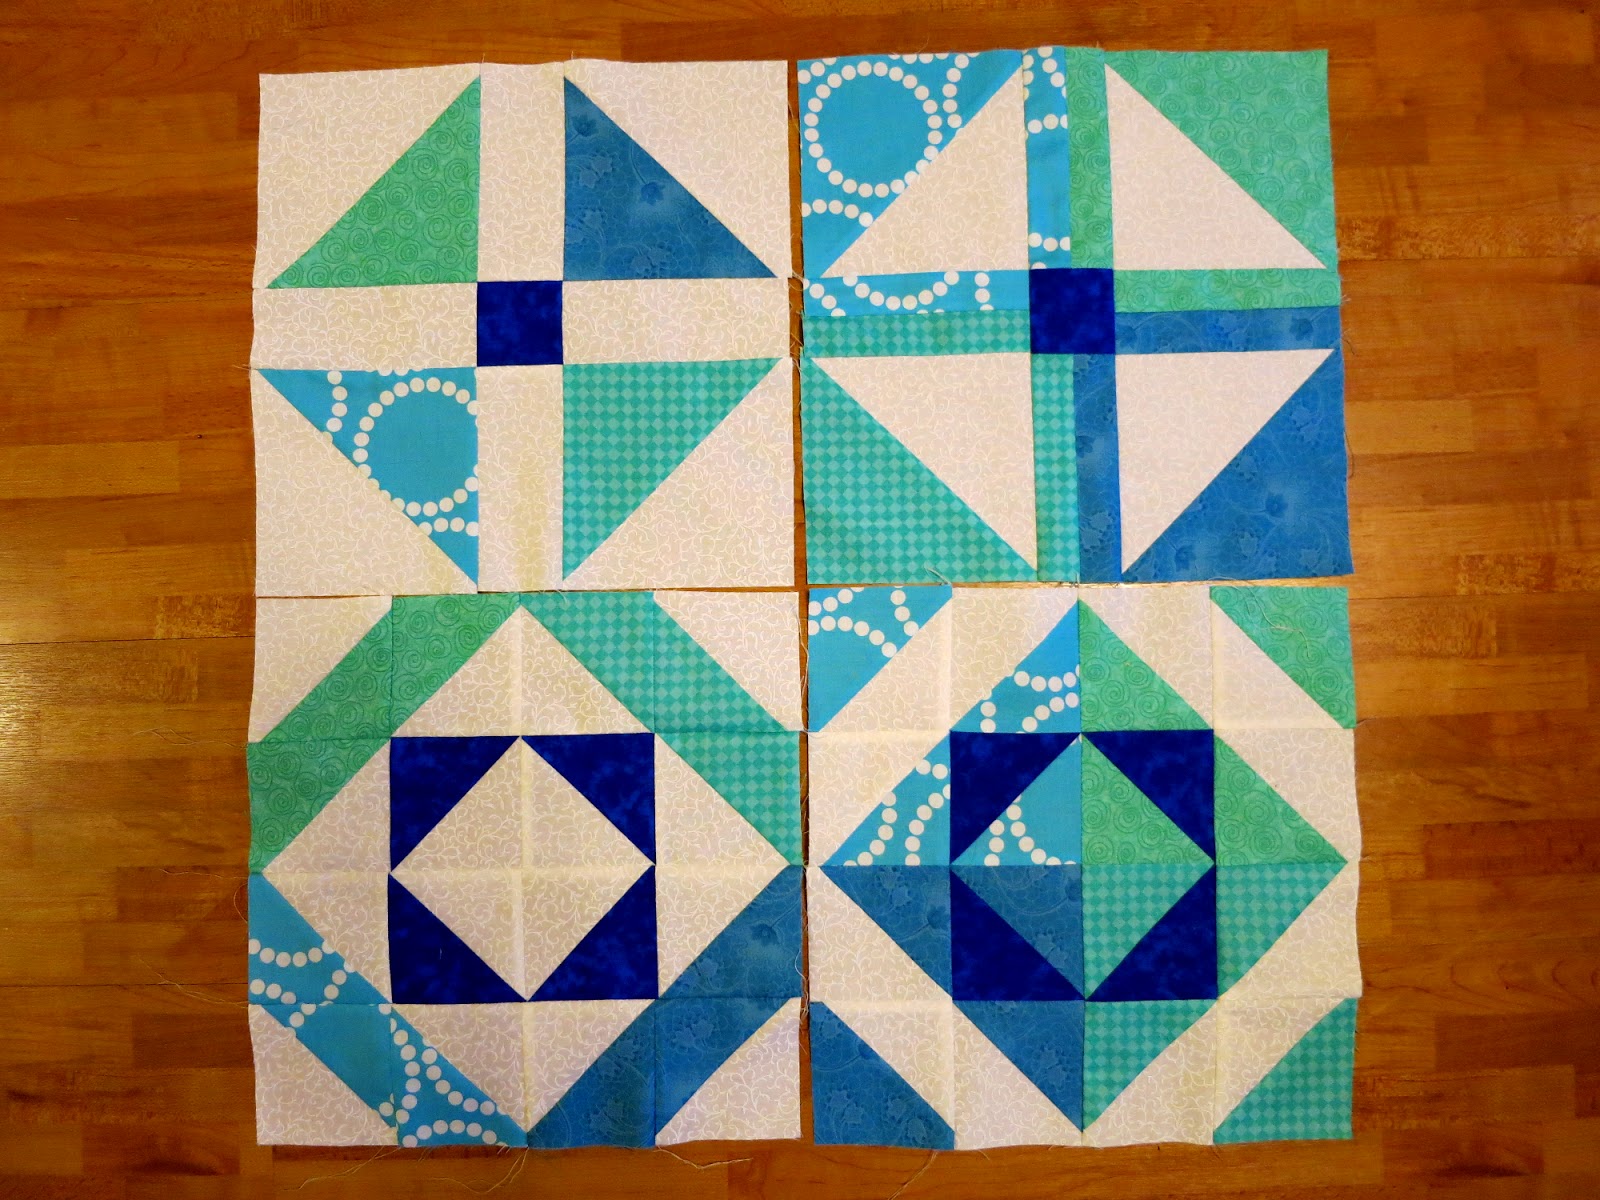
Last year was a bit of a write off in terms of quilt making, I'm not really sure why and what went wrong.  I joined the Gen X Quilters Block of the Month club to do the Vice Versa quilt and bought the pattern and fabric but never got into actually making up the blocks.

So I've decided to do it a year later! This is January and February's blocks, and I have March fabric cut and partially sewn. The plan is to finish the March blocks this week and then put it all away for a month or so while I concentrate on other items on the task list...

Well that's the plan anyway...


Sunday, 25 January 2015

Little Julia

I decided over the course of last year, whilst wearing my makes and during MeMadeMay, that I needed more second top layers - jumpers and cardigans.  So when the last Perfect Pattern Parcel came along I jumped at the chance as there were a couple of patterns that were already on my wish list, one of them being the Julia cardi from Mouse House Creations.


I'd already seen loads of versions on the blogsphere (like Scruffy Badgers one) and decided in was the right kind of slouchiness, and I'd purchased some dark grey ponte roma jersey from Abakhan for exactly this purpose.


I don't know why but I completely ignored all the pattern sizing information and blithely cut a small, as that fitted on the bust.  As you can see, it's a little small for my hips.... Hopefully it'll be fine wearing it as due to the slouchy fit and the lack of front closing. I do really like the style though so I'm going to make another in medium (when I'm allowed to buy more fabric....)


As you can see (!) I cut the long sleeved version, but I also went with the doubled over collar as the inside shows and I didn't want a visible hem.  It was really easy to sew everything together, the instructions are clear and there aren't any complicated steps - the ballpoint needle and walking foot make sewing knit fabric an absolute breeze! I was so lazy that I didn't even press the seams after sewing.  The only change I made was to add some twill tape to the shoulder seams to stop them stretching.


My machine has a couple of decorative knit stitches, so I used one to stitch the collar pieces together and neaten the cuffs. I ended up doing this in black thread (as I ran out of grey!!), but I really like the way it shows.


Wednesday, 21 January 2015

Mabel in Black

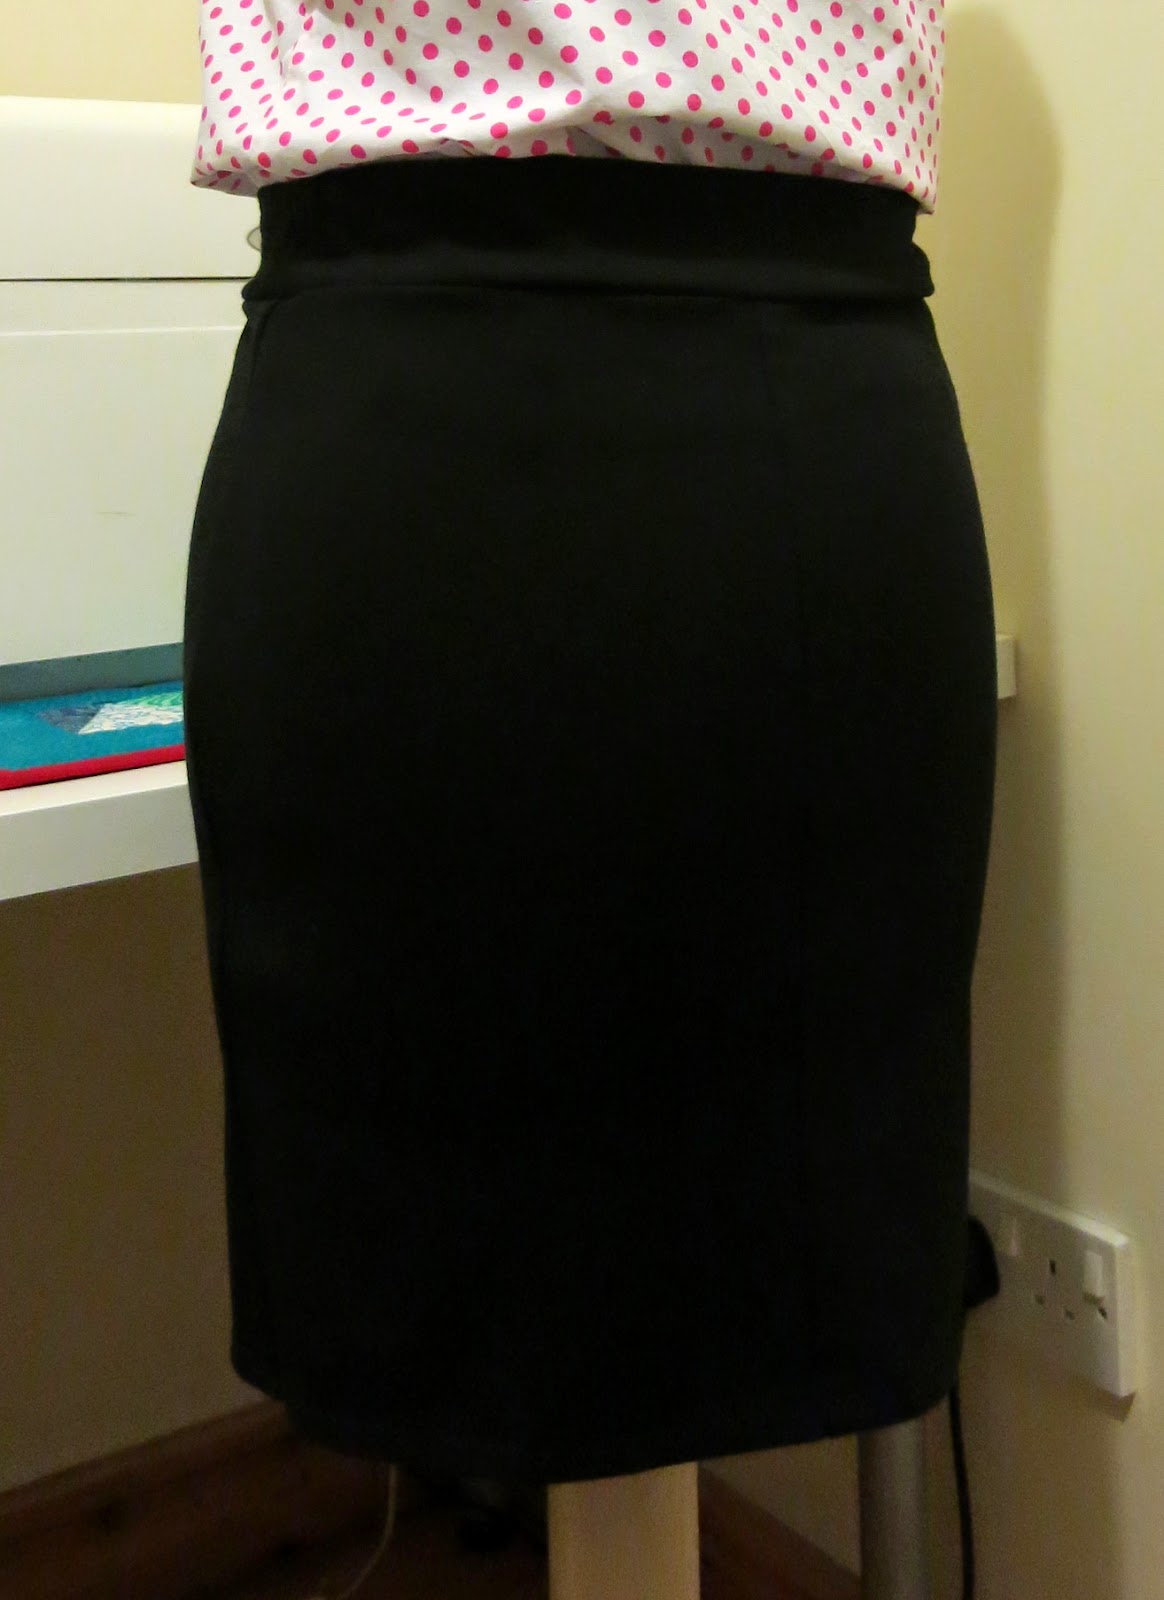
My favourite red jersey skirt (M&S for a fiver in the outlet shop, worn here with my biker jacket) has been worn every week and is looking a bit sorry for itself. Fortunately the Colette Mabel pattern was purchased when on offer and I picked up a metre of lovely heavy black jersey (probably Ponte Roma) for about £7 at the Vietnam fabric market last month....It was always going to be!

I cut a small, grading out to medium on the waist and added an extra 1.5" to the length. I don't like things too short and I wanted this skirt for work. This pattern is so economical that with some creative folding I managed to get it out of half a metre of fabric (so yep that's a skirt of £3.50 then....I win!!).


I sewed the main skirt first and found that it gaped a little in the small of my back so took the back seam in by 3/8" at the top. To make it a bit more snug I sewed the side seams at 4/8" on the waistband and 5/8" on the lining. All the stitching was done with the knit stitch on my machine and a ballpoint needle.

For the hem I turned up by 1/2" and used a decorative stretch stitch on my machine (because I couldn't be bothered to wind another bobbin to use twin needles!).


All the sewing took 1.5 hours...

I love this pattern. Simple, quick and economical. And I think the waistband makes it look much nicer than my tatty red skirt (not to mention the fabric being much better quality)!


There's going to be many more of these to come, it's just so quick and easy to make, not to mention comfy to wear.

Oh, and the spotty pink top. That's an unblogged Colette Sorbetto that I made for the Vietnam holiday - cotton poplin left over from lining my Kwik Sew jacket, and a bit of bias binding... And the model. That's Hetty. She arrived at Christmas. I think I still need to do a little bit of adjustment to get her to my size...

Sunday, 11 January 2015

Granny's Garden

Whoohooo, on a roll here! Granny's Garden quilt now completed and delivered safely to it's new home!  This uses the Lauren and Jessi Jung Trellis Quilt pattern (linky) and Riley Blake Designs Calliope range.  The backing and binding was a selection of sale fabrics from Abakhan.


I have to say (and I've probably said before) that isn't really my type of thing, the fabric is a bit too pastel flowery for me. But my Nan definitely loved it so its all good. Regardless of the fabric I am immensely proud of how this turned out.  I had a nightmare when I started to pin it together because the tension between the trellis centre and the border fabrics was completely out and all the borders were crinkled up.  I had to unpick all the borders and sew it back on making sure there was a lot more tension in the border fabric than the trellis.  I think it's because all the trellis fabric is all cut on the bias so it does 'weird' things - I had the same issue with the Wintersmith quilt (I really should finish that up!).

Once I'd sorted the tension and pinned everything together, it was surprisingly quick to quilt all the meandering squiggles over the trellis. I did think about doing lines, but I really wanted to practise free motion quilting and I love the texture it gives to the finished quilt.  It turned out quite well - definitely each quilt is a little bit better than the last.  Increasing the machine tension to 5.4 helped, along with taking it slowly, especially on the loops.


For the borders I quilted straight lines about half an inch apart setting the stitch length to 3mm.

The binding was hand sewn down then I machined over it.  For other quilts I've used some of the decorative stitches on the machine, but this time I just went with a simple zig zag - setting the stitch width 2.0mm and length to 2.5mm.


I even managed to be a bit more patient with the label making!! Waiting for the transfer to cool before peeling off the paper makes so much difference!


Thursday, 8 January 2015

Super Apron...

I made an apron as a Christmas present last year for my Cousin's little girl (piccie here) and her big brother requested his own as he's quite into baking!


There's 5 years or so difference in age between the two of them and I wasn't sure how much to scale up the one I'd already made, so I went hunting and came across this tutorial - http://yardsandyards.blogspot.co.uk/2010/06/yards-and-yards-original-best.html


I found some cool Superman fabric from Frumble, and to make it a bit more robust used some old jeans for the backing! But the leg of the jeans wasn't really wide enough to follow the measurements on the tutorial so I just made it as big as I could with the material available. When I tried it on, the apron seemed big enough for me so I think it'll be perfect for him.  Hope he likes it!!